Manage skills and plugins
OpenClaw can be extended using skills and plugins:
- Skills add new capabilities to the AI. For example, managing Model Context Protocol servers.
- Plugins extend the system to support additional channels or community features. For example, adding iMessage via BlueBubbles.
Why manual installation required
To protect your device, OpenClaw runs in a restricted, non-root environment without administrative privileges. This prevents the agent from modifying your system or self-installing software.
Understanding skills
Understanding where skills come from and how they are loaded helps you manage them effectively.
Locations and precedence
Skills are loaded from three locations. If a skill with the same name exists in multiple locations, OpenClaw uses the one with the highest precedence, allowing you to easily customize or override built-in skills.
The order of precedence from highest to lowest is as follows:
- Workspace skills (
Data/clawdbot/config/workspace/skills): Per-agent skills that override all others. - Managed/local skills (
Data/clawdbot/config/skills): Shared skills available to all agents on the same machine. - Bundled skills: Default skills shipped with your OpenClaw installation.
View all available skills
To see the complete list of skills available to your agent, including the bundled, shared, and workspace skills, run the openclaw skills list command in the OpenClaw CLI.
Compatibility on Olares
Not all skills can run in the Olares environment. OpenClaw actively blocks skills that cannot function correctly based on their declared requirements.
A skill might be blocked for the following reasons:
- Incompatible OS: The skill requires a different operating system (e.g., darwin for macOS), whereas Olares runs on Linux. For example, Apple ecosystem skills like apple-reminders cannot be used in Olares.
- Missing executables (
bins): The environment lacks a required command-line tool, such asghfor managing GitHub issues. - Missing configuration (
config): A required setting inopenclaw.jsonis not enabled. - Missing environment variables (
env): A required API key or authentication token has not been provided.
Install skills
There are three ways to add new skills to your OpenClaw:
- Install skills via the
openclaw configwizard. - Install skills from ClawHub, the package manager for OpenClaw.
- Install skills manually via local upload.
Install via openclaw config
You can use the built-in configuration wizard to install default or officially supported skills. In this example, we will install the clawhub skill, which is required for the next method.
Open the OpenClaw CLI.
Enter the following command to start the wizard:
bashopenclaw configFollow the prompts to configure your installation. Use the arrow keys to navigate and press Enter to confirm.
Settings Option Where will the Gateway run Local (this machine) Select settings to configure Skills Configure skills now Yes Install missing skill dependencies Navigate to the skill clawhub, press the Space key
to select it, and then press Enter.Preferred node manager for skill installs npm
Wait for the messageInstalled clawhubto appear
before proceeding.Set [API_KEY] for [skill] Select No for all these settings. Finally, select Continue for Select sections to configure. The message
Configure completeappears, indicating the setup is finished.
Install from ClawHub
Use the ClawHub CLI to search and install skills from ClawHub. Installing skills via ClawHub automatically handles the necessary package dependencies.
Prerequisite
Ensure that the clawhub skill is installed. This skill enables the openclaw skills commands like list, search, and install, which allows you install more ClawHub-backed skills.
Open the OpenClaw CLI.
To view the list of officially preset skills, run the following command:
bashopenclaw skills listTo search for a specific skill, use the
searchcommand.For example, to search for a calendar skill, run the following command:
bashopenclaw skills search Caldav CalendarThe terminal returns the search results, displaying the skill ID at the beginning, followed by its description. In this case, the skill ID is
caldav-calendar.
Security recommendation
It is highly recommended that you search for and read the details of a skill on the official ClawHub website before installing it. This ensures you are getting the correct skill and protects you from installing malicious packages.
Install the target skill using its skill ID.
For example, to install this calendar skill, run the following command:
bashopenclaw skills install caldav-calendarWait for the terminal to indicate that the skill is installed, and then verify by running the following command:
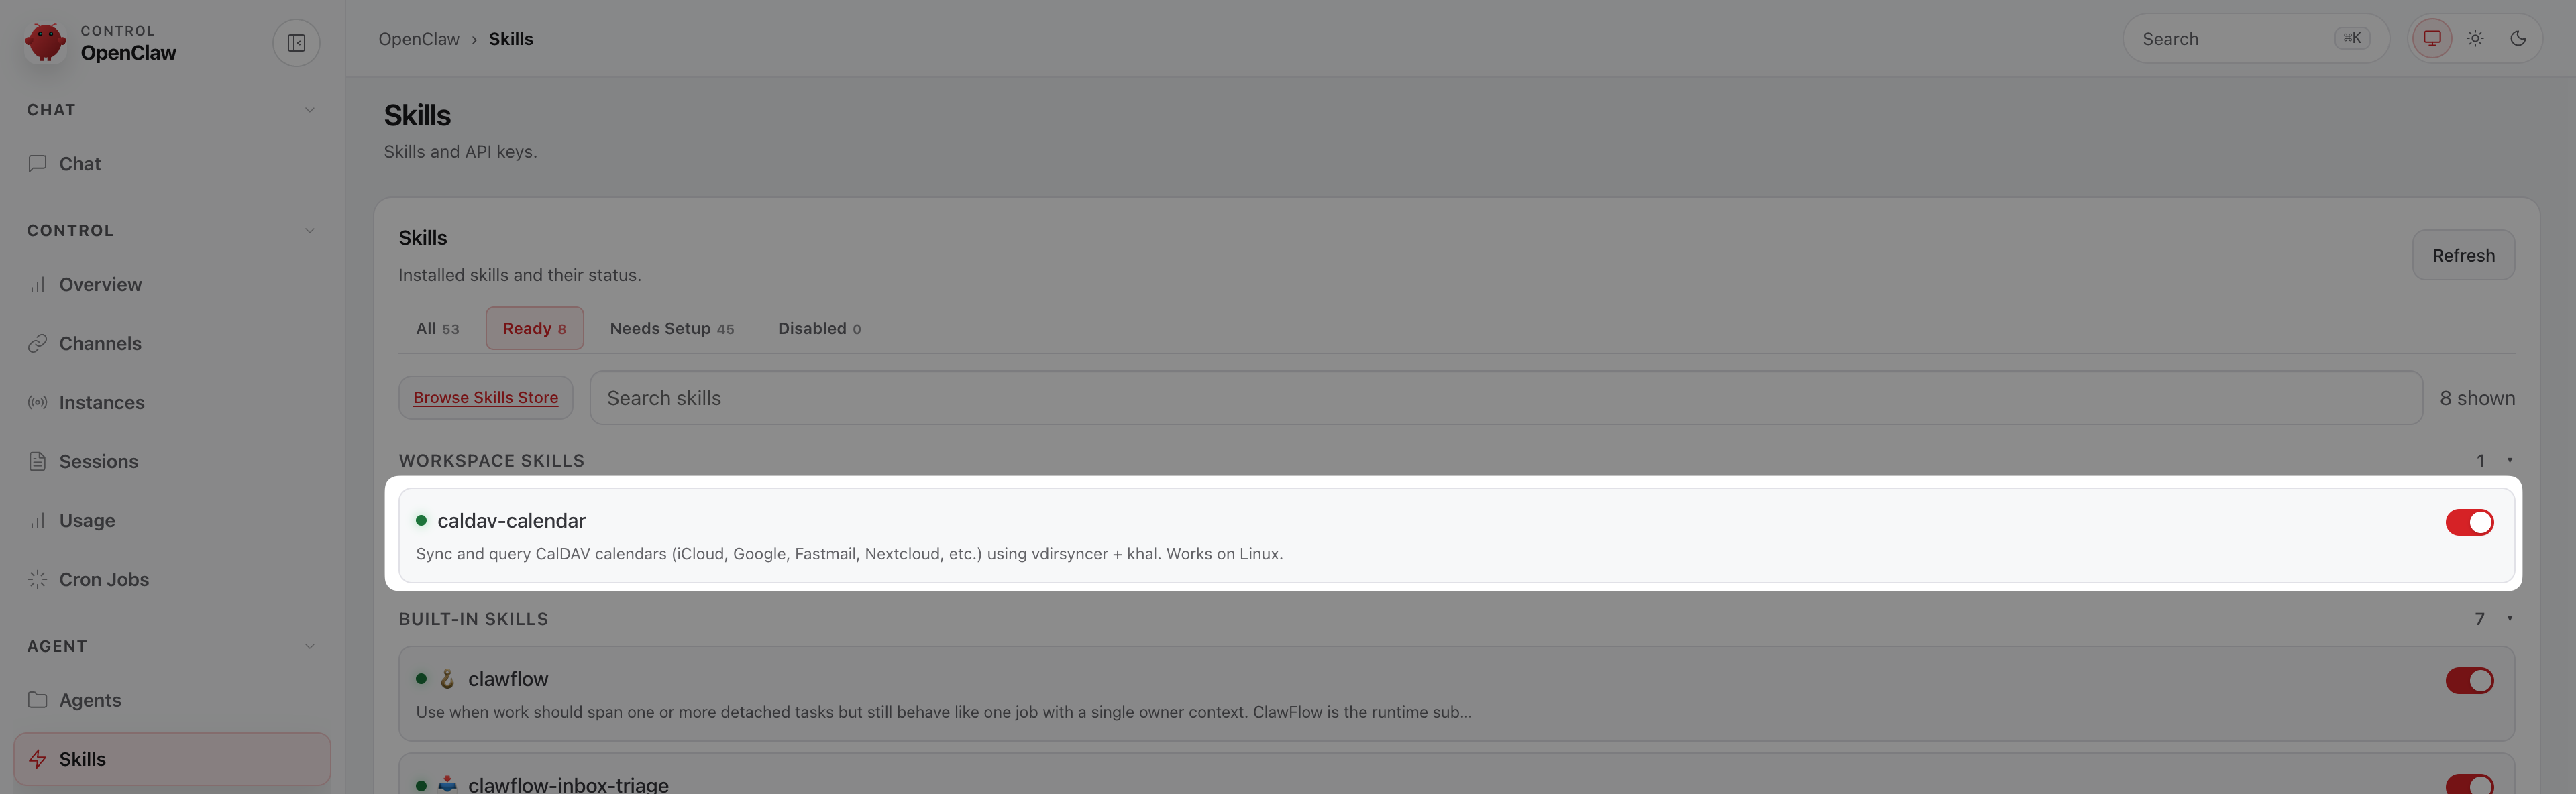
bashopenclaw skills listThe status of caldav-calendar is ready, indicating the installation is successful.
Open the Control UI, go to the Skills page, and then click the Ready tab. You will see the newly installed skill is enabled.
Upload skills
- Open the Files app from the Launchpad, and then go to Application > Data > clawdbot > config.
- Create a new folder named
skills. - Upload your skill package, such as an extracted zip file, into this
skillsfolder. - Install required package dependencies if any are missing.
Install missing dependencies
If a skill is blocked or unusable, you need to identify and install its missing dependencies.
Open the OpenClaw CLI and run the following command:
bashopenclaw skills checkThe terminal lists all unavailable skills and shows their missing requirements in parentheses.
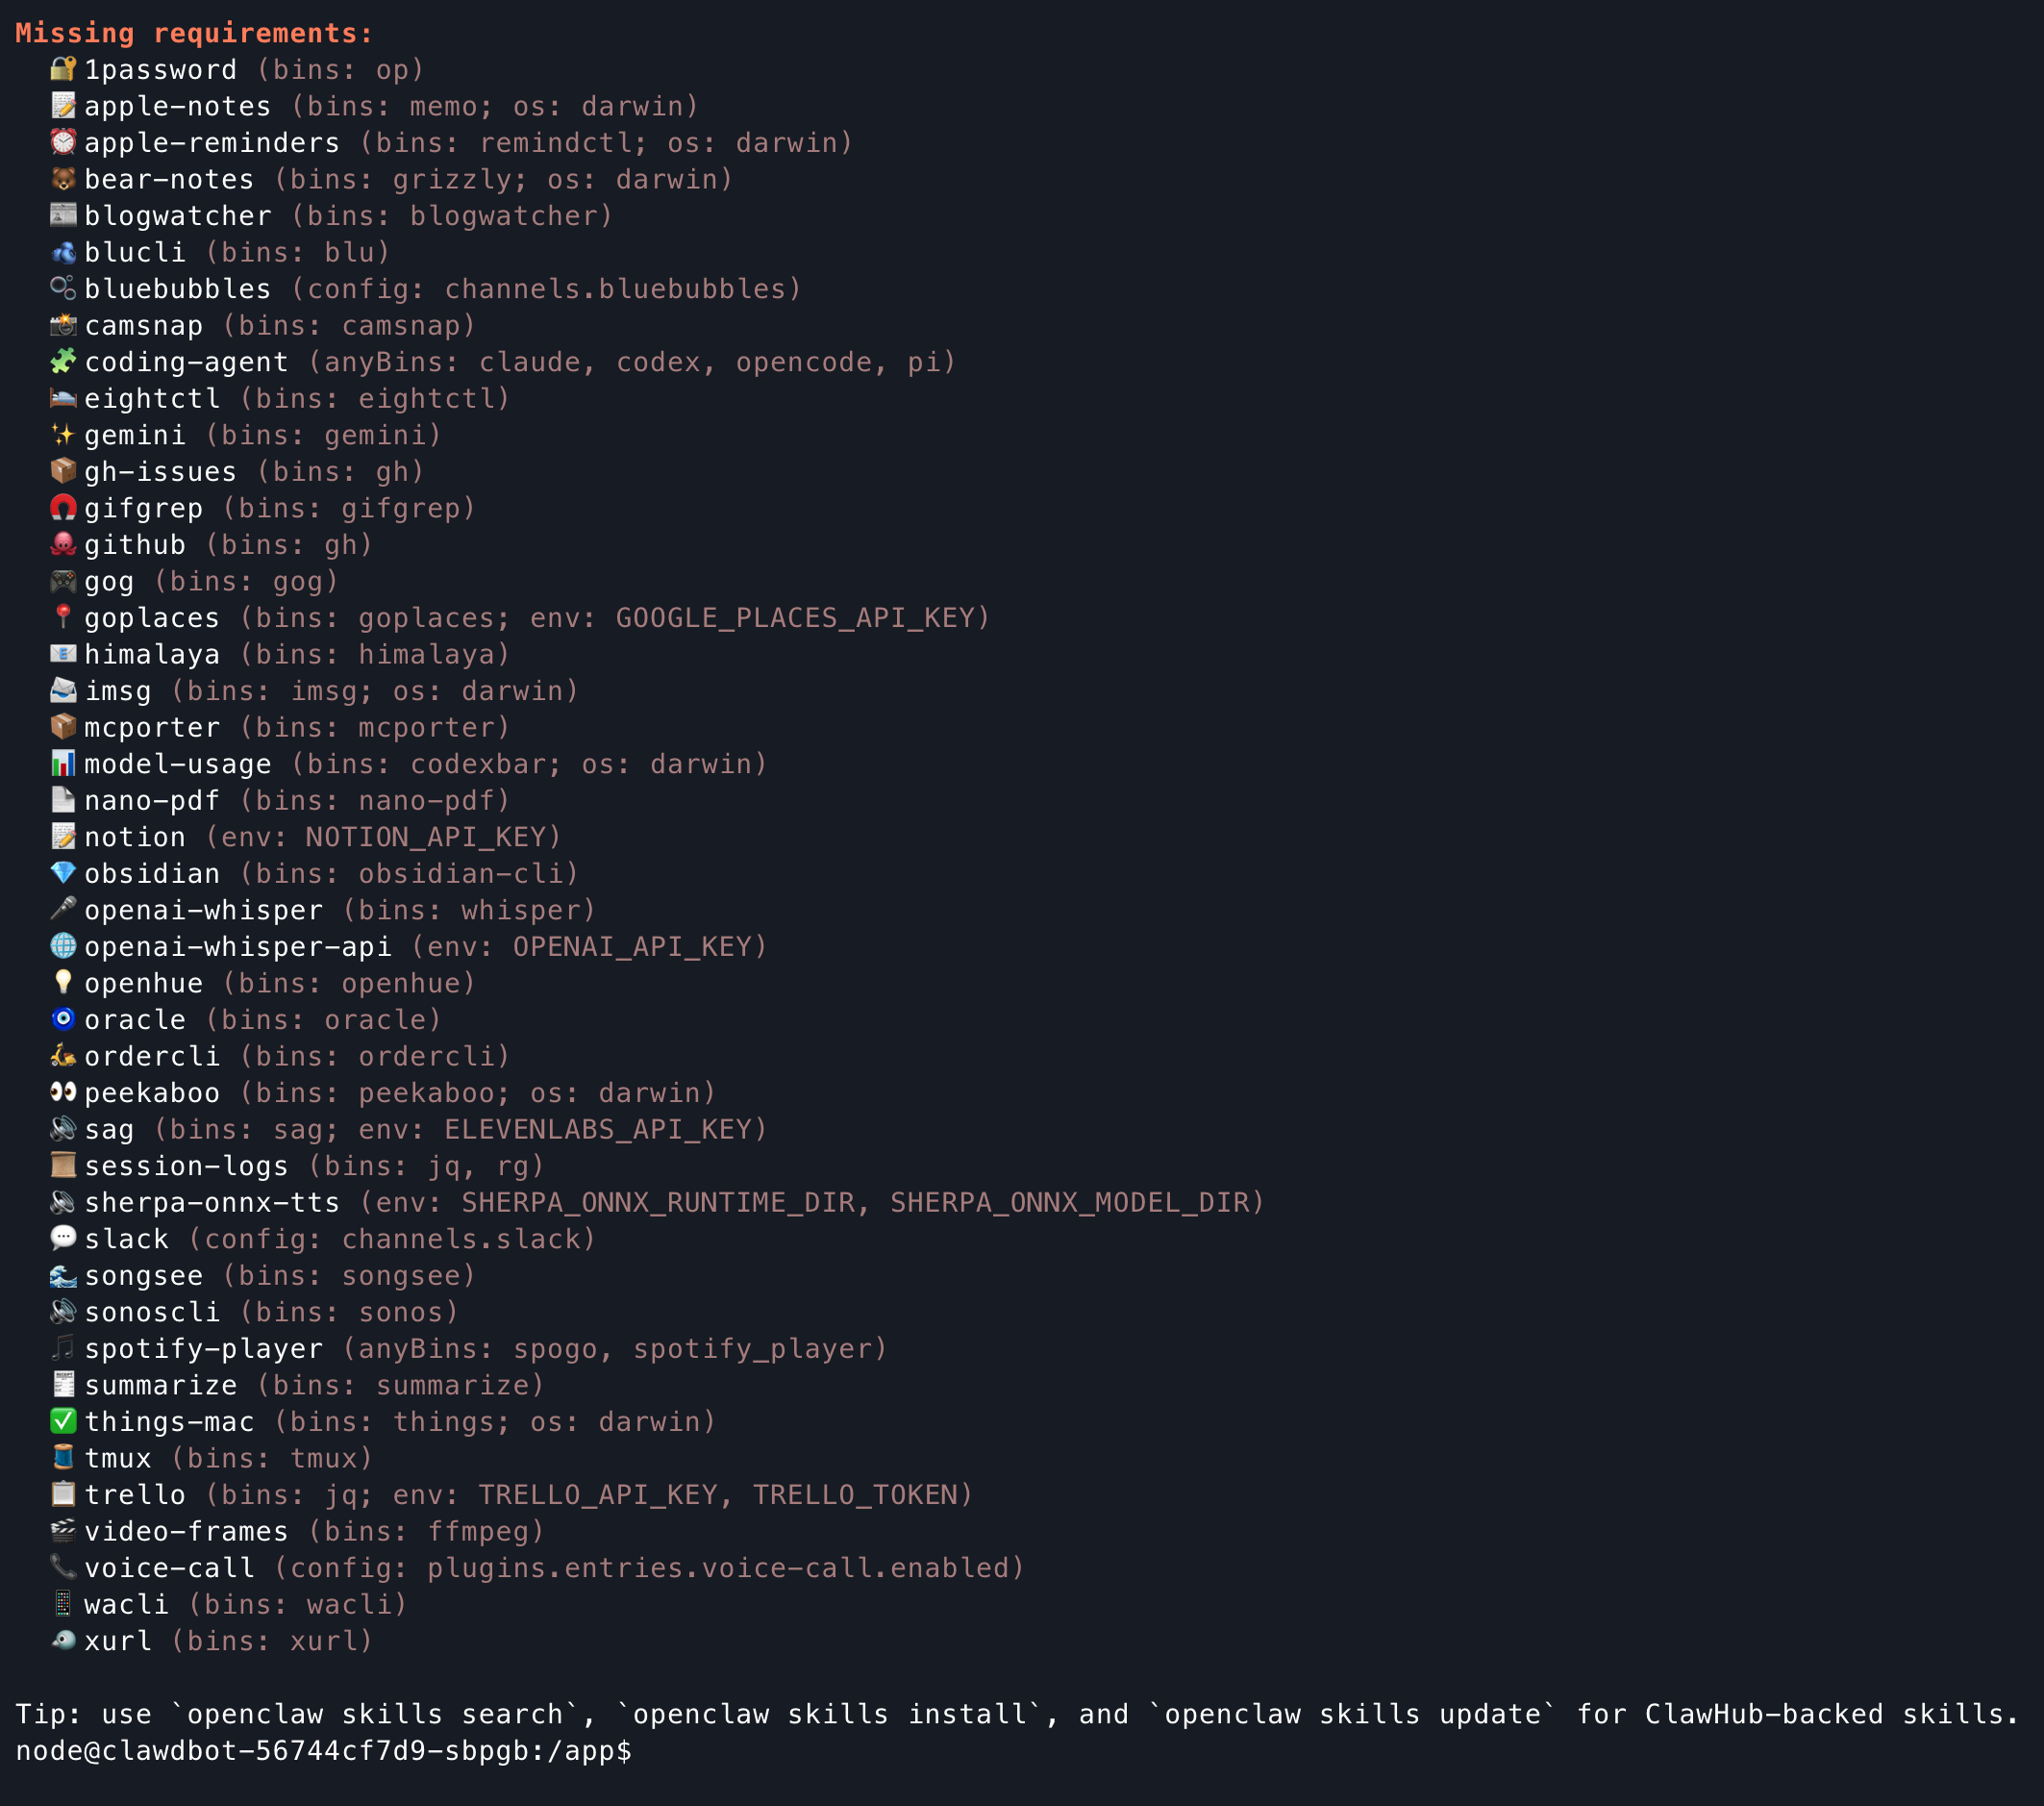
Use
npmorbrewto install the dependency manually. For detailed information about the installation requirements, see theskills.mdfile.- Example: The
gh-issuesskill requiresghto be installed. - Run the following command to install it:bash
npm i -g gh
- Example: The
When the installation of missing components is completed, restart the OpenClaw container for the changes to take effect:
a. Open Control Hub from Desktop.
b. Click clawdbot under Deployments, and then click Restart.
Verify the installation:
a. Open the Control UI.
b. Go to the Skills page. The skill should now be tagged with eligible.
c. Configure required API keys if there is any, and then the agent will be able to use the skill.
Install plug-ins
In the OpenClaw CLI, check the list of compatible plug-ins by entering the following command:
bashopenclaw plugins listFind the target plug-in name in the Name column, and then install it by entering the following command:
bashopenclaw plugins install {Name}For example, to install BlueBubbles, enter the following command:
bashopenclaw plugins install @openclaw/bluebubblesBlocked plugin installation
If your installation fails with a
Plugin "{Name}" installation blockederror, you can bypass this security restriction by appending--dangerously-force-unsafe-installto your command. Only bypass this protection if you are certain the plugin is safe and comes from a trusted source.For example:
bashopenclaw plugins install @openclaw/nextcloud-talk --dangerously-force-unsafe-installWhen the installation is completed, close OpenClaw CLI and open it again to load the new plug-in.
Verify by checking the plugin status:
bashopenclaw plugins listNow the status of the plug-in is loaded.
Open the Control UI, go to Automation > Plugins.
Find @openclaw/bluebubbles and click it to expand its panel:
- If it is enabled, turn off the toggle switch, and then turn it on again to force the system to explicitly save the configuration.
- If it is disabled, turn on the toggle switch.
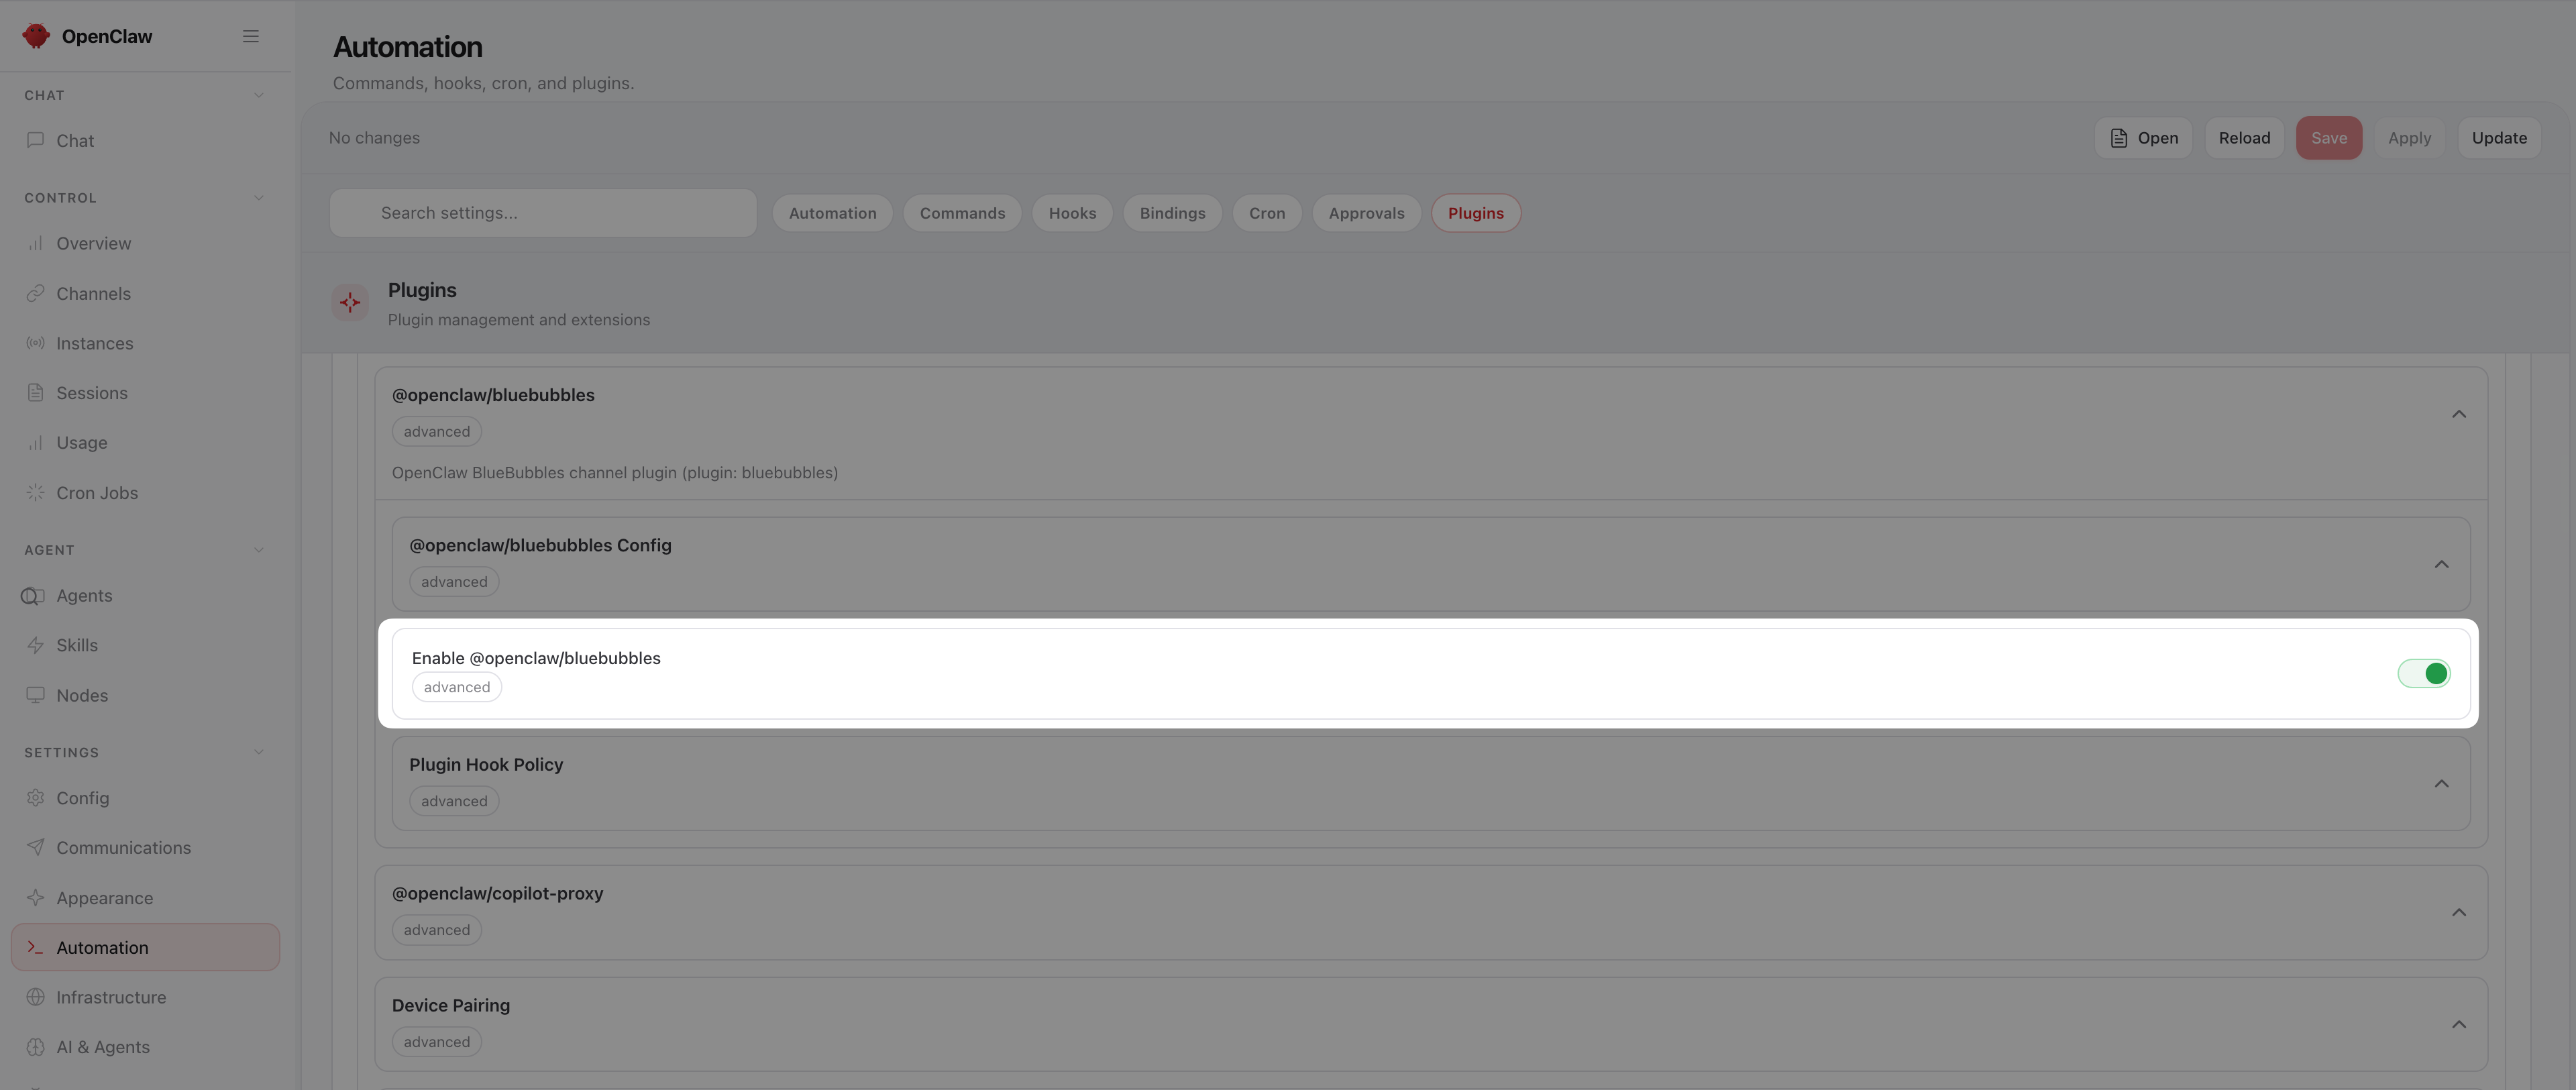
Click Save in the upper-right corner. The system validates the config and applies the change automatically.
Manual restart
If you need to restart OpenClaw manually, do not use the OpenClaw CLI. Use one of the following methods:
- Restart the app from Settings or Market:
- Open Settings, go to Applications > OpenClaw, click Stop, and then click Resume.
- Open Market, go to My Olares, find OpenClaw, click keyboard_arrow_down next to the operation button, select Stop, and then select Resume.
- Restart the container: Open Control Hub, click
clawdbotunder Deployments, and then click Restart.
- Restart the app from Settings or Market: